Triggering jobs through the API
Note:
- Introduced in GitLab CE 7.14.
- GitLab 8.12 has a completely redesigned job permissions system. Read all about the new model and its implications.
- GitLab 9.0 introduced a trigger ownership to solve permission problems.
Triggers can be used to force a rebuild of a specific ref (branch or tag)
with an API call.
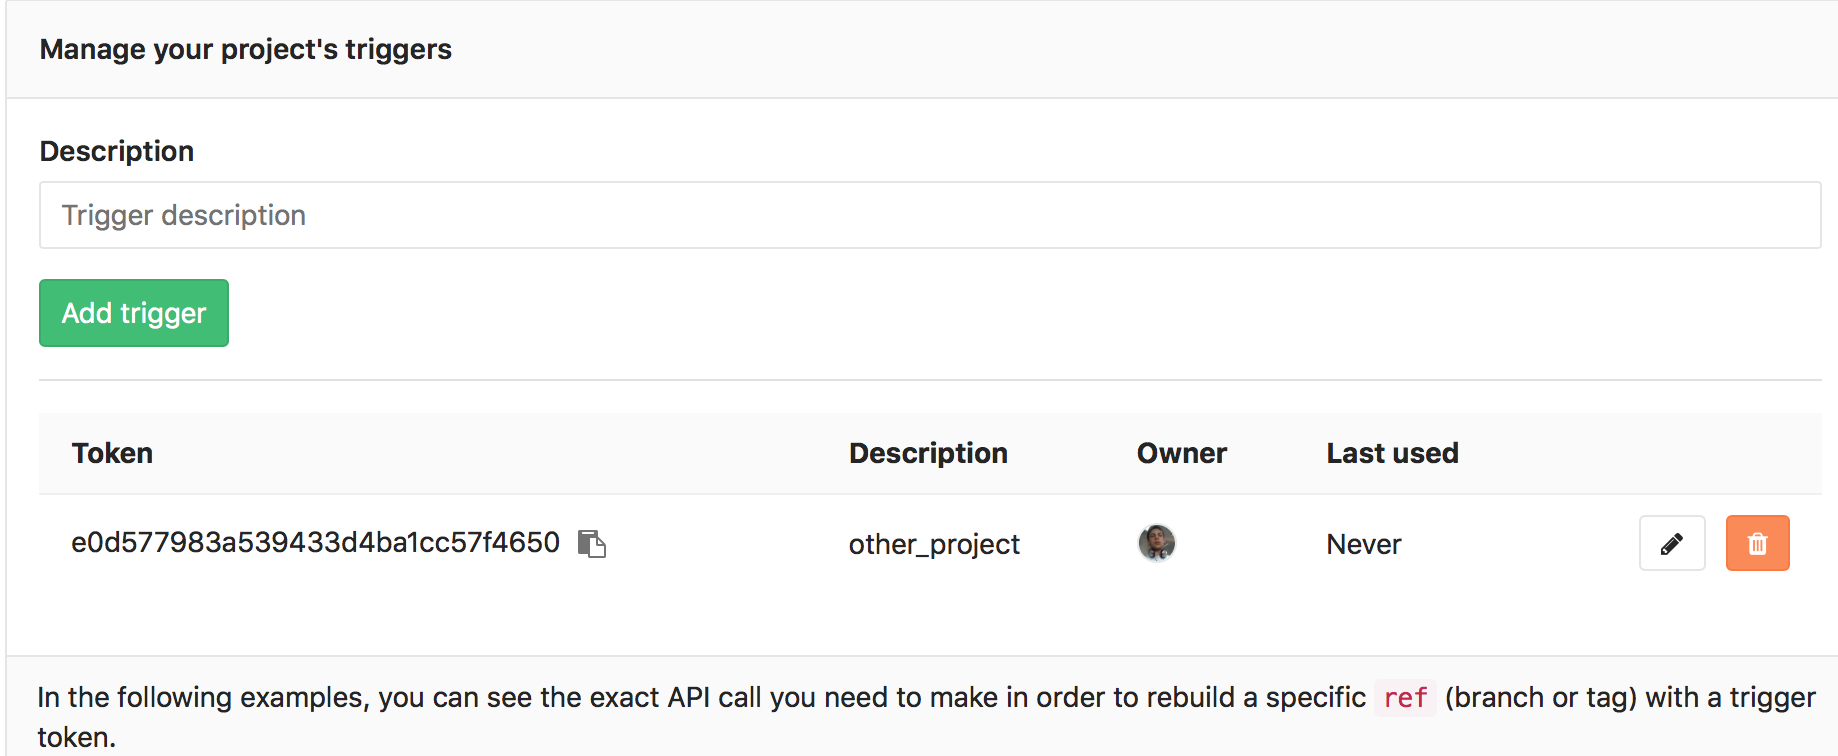
Add a trigger
You can add a new trigger by going to your project's Settings ➔ CI/CD Pipelines ➔ Triggers. The Add trigger button will create a new token which you can then use to trigger a rerun of this particular project's pipeline.
Every new trigger you create, gets assigned a different token which you can
then use inside your scripts or .gitlab-ci.yml. You also have a nice
overview of the time the triggers were last used.
Take ownership
Each created trigger when run will impersonate their associated user including their access to projects and their project permissions.
You can take ownership of existing triggers by clicking Take ownership. From now on the trigger will be run as you.
Legacy triggers
Old triggers, created before 9.0 will be marked as Legacy. Triggers with the legacy label do not have an associated user and only have access to the current project.
Legacy trigger are considered deprecated and will be removed with one of the future versions of GitLab.
Revoke a trigger
You can revoke a trigger any time by going at your project's Settings > Triggers and hitting the Revoke button. The action is irreversible.
Trigger a pipeline
Note: Valid refs are only the branches and tags. If you pass a commit SHA as a ref, it will not trigger a job.
To trigger a job you need to send a POST request to GitLab's API endpoint:
POST /projects/:id/trigger/pipelineThe required parameters are the trigger's token and the Git ref on which
the trigger will be performed. Valid refs are the branch and the tag. The :id
of a project can be found by querying the API
or by visiting the CI/CD Pipelines settings page which provides
self-explanatory examples.
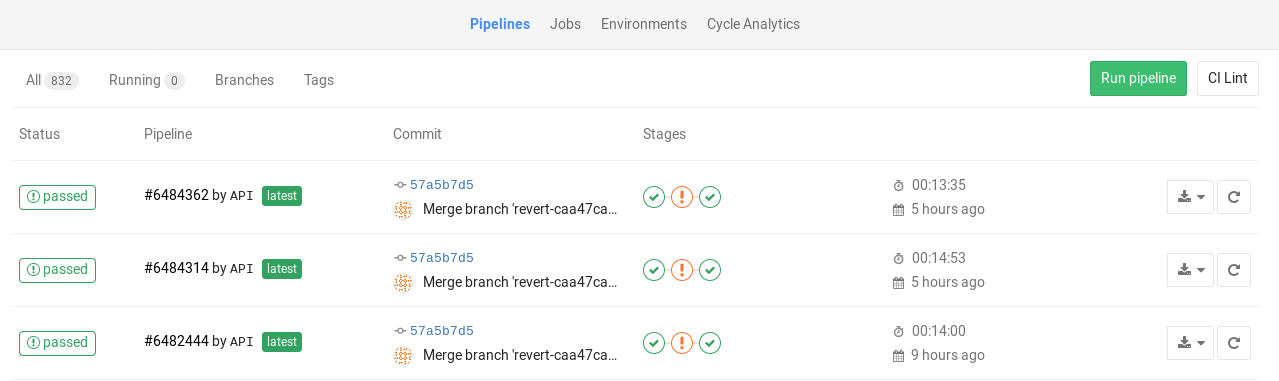
When a rerun of a pipeline is triggered, the information is exposed in GitLab's UI under the Jobs page and the jobs are marked as triggered 'by API'.
You can see which trigger caused the rebuild by visiting the single job page. A part of the trigger's token is exposed in the UI as you can see from the image below.
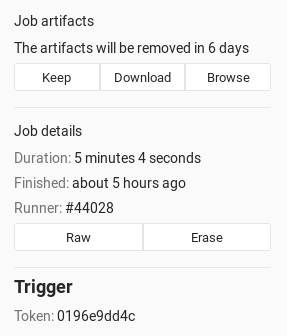
See the Examples section for more details on how to actually trigger a rebuild.
Trigger a pipeline from webhook
Introduced in GitLab 8.14.
To trigger a job from webhook of another project you need to add the following webhook url for Push and Tag push events:
https://gitlab.example.com/api/v4/projects/:id/ref/:ref/trigger/pipeline?token=TOKENNote:
refshould be passed as part of url in order to take precedence overreffrom webhook body that designates the branchref that fired the trigger in the source repository.refshould be url encoded if contains slashes.
Pass job variables to a trigger
You can pass any number of arbitrary variables in the trigger API call and they
will be available in GitLab CI so that they can be used in your .gitlab-ci.yml
file. The parameter is of the form:
variables[key]=valueThis information is also exposed in the UI.
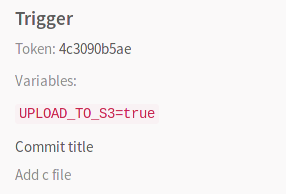
See the Examples section below for more details.
Examples
Using cURL you can trigger a rebuild with minimal effort, for example:
curl --request POST \
     --form token=TOKEN \
     --form ref=master \
     https://gitlab.example.com/api/v4/projects/9/trigger/pipeline
In this case, the project with ID 9 will get rebuilt on master branch.
Alternatively, you can pass the token and ref arguments in the query string:
curl --request POST \
    "https://gitlab.example.com/api/v4/projects/9/trigger/pipeline?token=TOKEN&ref=master"
Triggering a pipeline within .gitlab-ci.yml
You can also benefit by using triggers in your .gitlab-ci.yml. Let's say that
you have two projects, A and B, and you want to trigger a rebuild on the master
branch of project B whenever a tag on project A is created. This is the job you
need to add in project's A .gitlab-ci.yml:
build_docs:
  stage: deploy
  script:
  - "curl --request POST --form token=TOKEN --form ref=master https://gitlab.example.com/api/v4/projects/9/trigger/pipeline"
  only:
  - tags
Now, whenever a new tag is pushed on project A, the job will run and the
build_docs job will be executed, triggering a rebuild of project B. The
stage: deploy ensures that this job will run only after all jobs with
stage: test complete successfully.
Note: If your project is public, passing the token in plain text is probably not the wisest idea, so you might want to use a secure variable for that purpose.
Making use of trigger variables
Using trigger variables can be proven useful for a variety of reasons.
- Identifiable jobs. Since the variable is exposed in the UI you can know why the rebuild was triggered if you pass a variable that explains the purpose.
- Conditional job processing. You can have conditional jobs that run whenever a certain variable is present.
Consider the following .gitlab-ci.yml where we set three
stages and the upload_package job is run only
when all jobs from the test and build stages pass. When the UPLOAD_TO_S3
variable is non-zero, make upload is run.
stages:
- test
- build
- package

run_tests:
  script:
  - make test

build_package:
  stage: build
  script:
  - make build

upload_package:
  stage: package
  script:
  - if [ -n "${UPLOAD_TO_S3}" ]; then make upload; fi
You can then trigger a rebuild while you pass the UPLOAD_TO_S3 variable
and the script of the upload_package job will run:
curl --request POST \
  --form token=TOKEN \
  --form ref=master \
  --form "variables[UPLOAD_TO_S3]=true" \
  https://gitlab.example.com/api/v4/projects/9/trigger/pipeline
Using webhook to trigger job
You can add the following webhook to another project in order to trigger a job:
https://gitlab.example.com/api/v4/projects/9/ref/master/trigger/pipeline?token=TOKEN&variables[UPLOAD_TO_S3]=trueUsing cron to trigger nightly jobs
Whether you craft a script or just run cURL directly, you can trigger jobs
in conjunction with cron. The example below triggers a job on the master
branch of project with ID 9 every night at 00:30:
30 0 * * * curl --request POST --form token=TOKEN --form ref=master https://gitlab.example.com/api/v4/projects/9/trigger/pipelineUsing scheduled triggers
Introduced in GitLab CE 9.1 as experimental.
In order to schedule a trigger, navigate to your project's Settings ➔ CI/CD Pipelines ➔ Triggers and edit an existing trigger token.

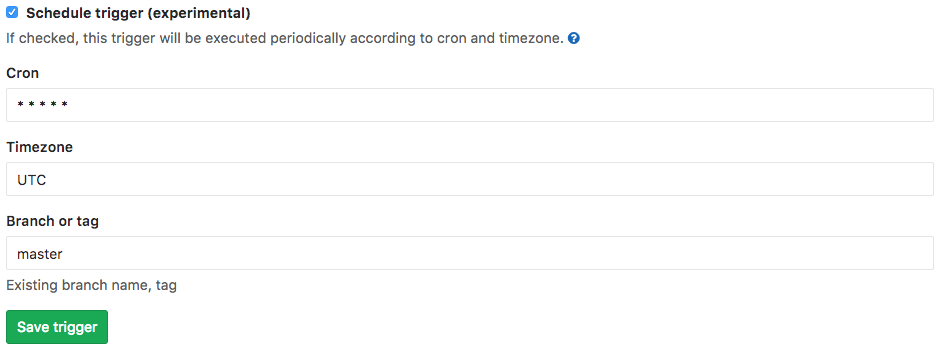
To set up a scheduled trigger:
- Check the Schedule trigger (experimental) checkbox
- Enter a cron value for the frequency of the trigger (learn more about cron notation)
- Enter the timezone of the cron trigger (see a list of timezones)
- Enter the branch or tag that the trigger will target
- Hit Save trigger for the changes to take effect
You can check a next execution date of the scheduled trigger, which is automatically calculated by a server.

Notes:
- Those triggers won't be executed precicely. Because scheduled triggers are handled by Sidekiq, which runs according to its interval. For exmaple, if you set a trigger to be executed every minute (
* * * * *) and the Sidekiq worker performs 00:00 and 12:00 o'clock every day (0 */12 * * *), then your trigger will be executed only 00:00 and 12:00 o'clock every day. To change the Sidekiq worker's frequency, you have to edit thetrigger_schedule_workervalue inconfig/gitlab.ymland restart GitLab. The Sidekiq worker's configuration on GiLab.com is able to be looked up at here.- Cron notation is parsed by Rufus-Scheduler.